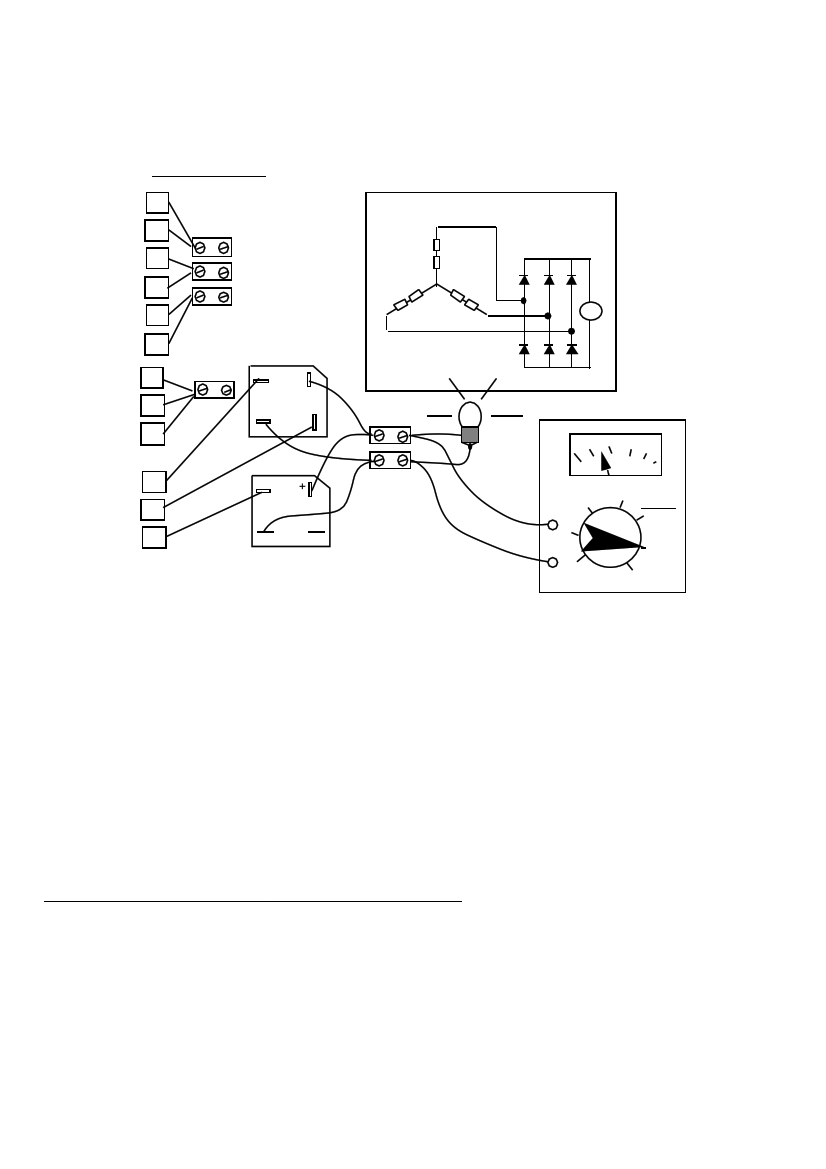
46. DC TEST COILS CONNECTED STAR
1B BLOCK
4A CONNECTOR
CIRCUIT
SCHEMATIC
DIAGRAM
2B SERIES
5A CONNECTIONS
3B
V
6A
1A +
2A
3A
BULB
4B
5B
DCV
6B
RECTIFIERS
10
MULTIMETER
Rotate the rotor by hand as before, approximately one revolution per second (60
rpm).
The meter should show a steady reading around 4 volts DC (or 3 volts with the bulb
present). The bulb should glow with a steady light, not flickering as before.
If there is no reading, or the bulb flickers, then there is a faulty connection or a
faulty rectifier. Check the connections carefully. Try another rectifier.
You can also test the PMG without a bulb or a meter. Simply connect the positive and
negative wires from the rectifiers together (all four) in a 'short circuit'. Now try to
turn the PMG. It should be stiff but smooth to turn. If it trembles as you turn it then
there is a fault.
Connecting the PMG to the 12 volt battery
Star and Delta connections
For low windspeeds, connect the coils 'star' as above. For high winds, and higher
current output, connect the coils 'delta', as in diagram 47.
PMG manual
page 44
June 2001